Graphite Simple Head

Dzimirsky Realism Art Master Academy

The Dzimirsky Drawing Method Simple Head Shading

Dzimirsky Drawing Method: Simple Head Shading

Tools In This Lesson


HB, B, 3B pencils

Paper: Hahnemühle Skizze 190


To warm up and get familiar with the shading method, let’s start with a simplified head with just cross-hatching as a first exercise. The video has no sound - read the description below.


Download the image below and print it on a normal office paper so that you can easily trace it. Since this exercise is all about shading, and correct proportions are not really important here, you can also just eyeballing it without the need of tracing or gridding it.

Download image

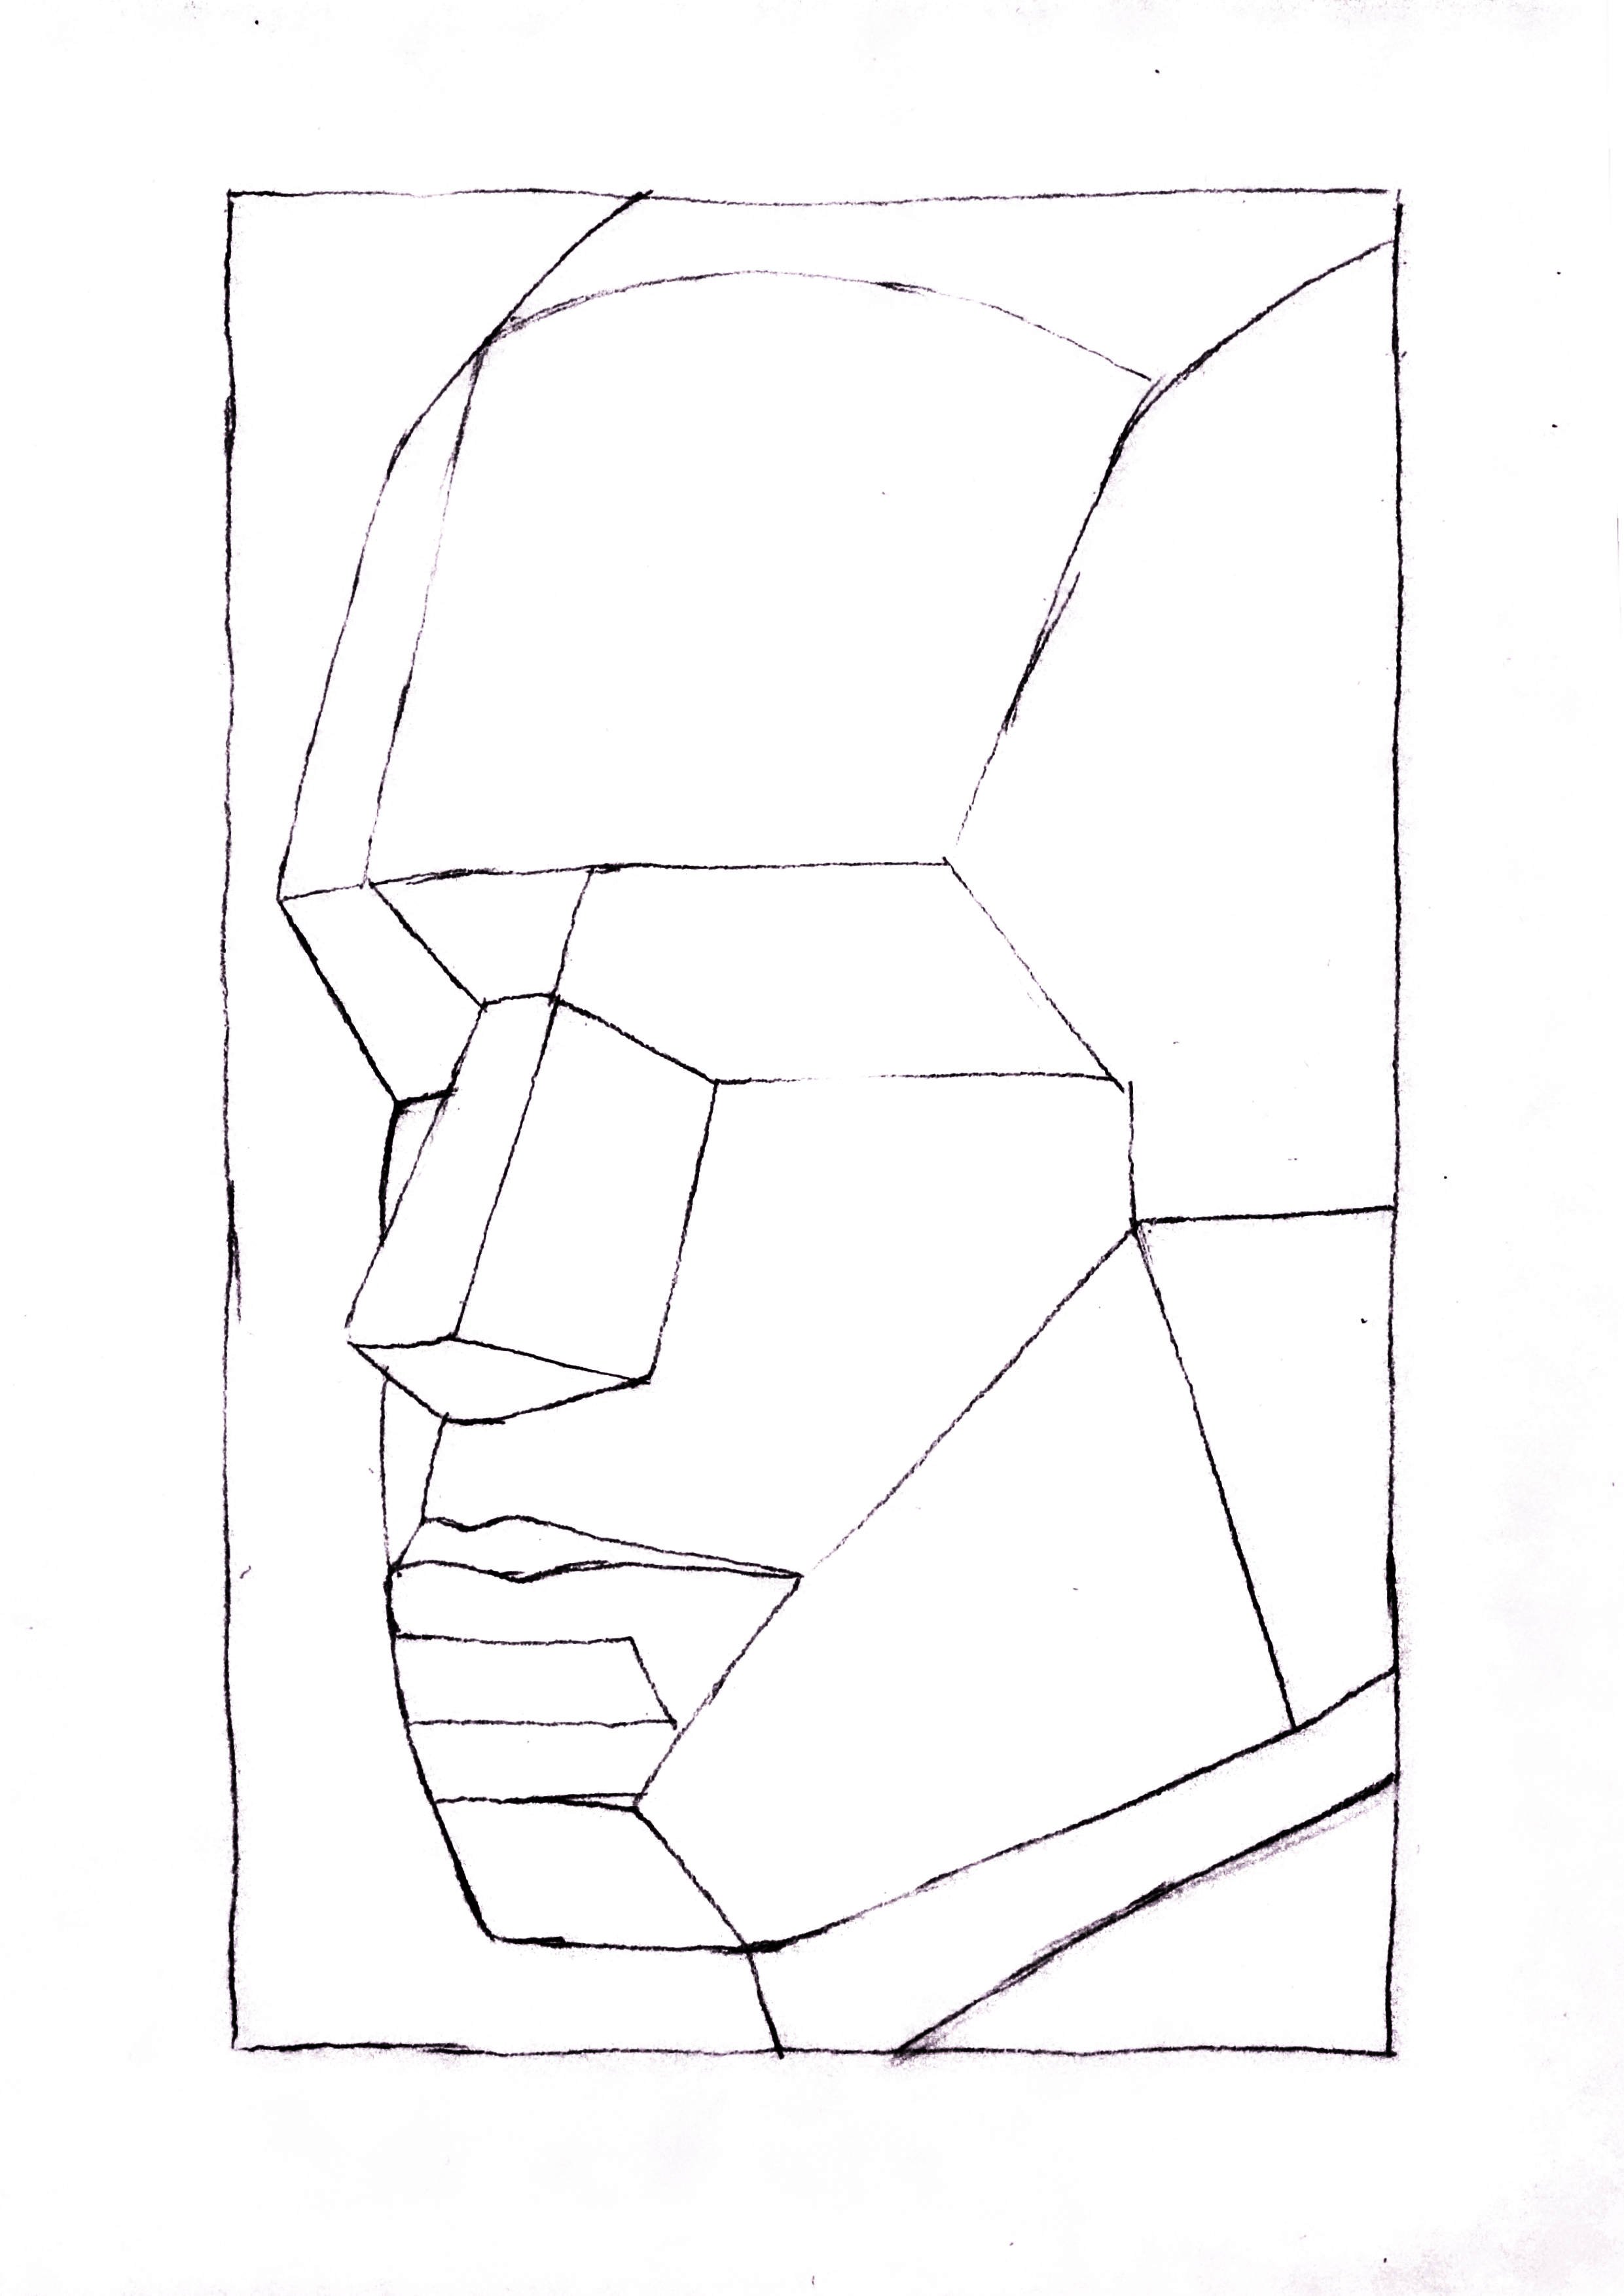
For a first try if you are a beginner, you can also just shade on the print out directly. Office paper is not suitable for serious drawing but it is ok for a first try.


Exercise Description

Start with an HB pencil for the first 3 shapes. Shade slowly enough so that you can maintain an even and very light pressure, and that you do not shade too much or too short of the contour lines.

Use a 3B pencil for the 2 eye shapes. Again, though it looks much darker than the HB pencil, there is not much pressure applied either. Experiment with the pressure and see if you can match the tones in the video.

Back to HB for the left side and the nose.

3B for the underside of the nose and the upper lip.

The shadow under the lip is done with HB again.

The chin is shaded with a B pencil, and the next 2 shapes with a HB pencil. These shapes are shaded generously overlapping to the smaller shape next to them since that shape will be shaded darker with a B pencil.

The shadow shape on the neck is shaded with a 3B pencil.

SUBMIT YOUR DRAWING

Once you finished this exercise, you can submit it here for review. Try to judge it yourself before submitting - if you feel that you could do it better then do it again and submit the new drawing instead. It is not about finishing the lesson and move on to the next one - it is about mastering it.

You will receive points from 1 to 10 based on the quality of your drawing. For example, 10 means excellent, and 5 and under means you should practice it again before moving on to the next exercise.

Instructions

Take a clear photo of your drawing. In order to judge the quality of your shading, make sure that the photo is of a high resolution and that is is sharp enough. Zoom into your photo to check this before submitting.


NOTES & TAKEAWAYS


Learn to control the pencil and the pressure to get smooth, solid shading.

Shade overlapping into other area that will be darker than the tone you are shading to ensure that there are no gaps.

Do not erase mistakes. This is also a test to see how clean you can shade. If you drew too many lines out of the shapes (except where they are suppose to for the overlapping), and your shading is not even and rough, it is a sign that you want to practice this further. 

Remember, this kind of shading is the easiest part but also the most important foundation of any realistic drawing. 

Do not follow the shapes when shading. Learn to shade "neutrally" or independent from the shapes. Stick with one shading direction for a layer.

Next lesson -->